Amazingly Raku - Part 7: The Editor
[94.7] Published 9. December 2020.See also: The Introduction | Part 1: The Maze | Part 2: The Path | Part 3: The Wall | Part 4: The Class | Part 5: The First Game | Part 6: The Second Game.
The Editor is integrated with «amazing-gtk». Start the program in Edit Mode with the «-e» command line argument:
$ ./amazing-gtk -e
This will generate a random maze, that you can edit, and/or save.
It is also possible to edit an existing maze, just specify the filename on the command line:
$ ./amazing-gtk -e /tmp/yIF_VWQiTw-25x25.maze
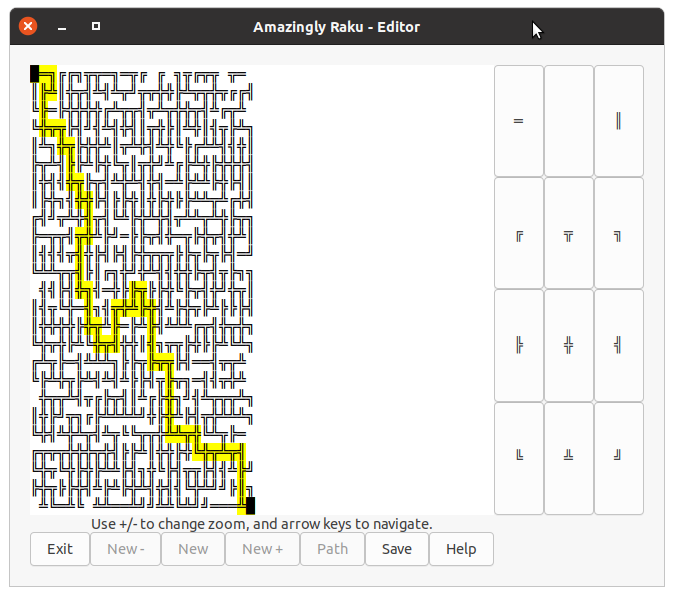
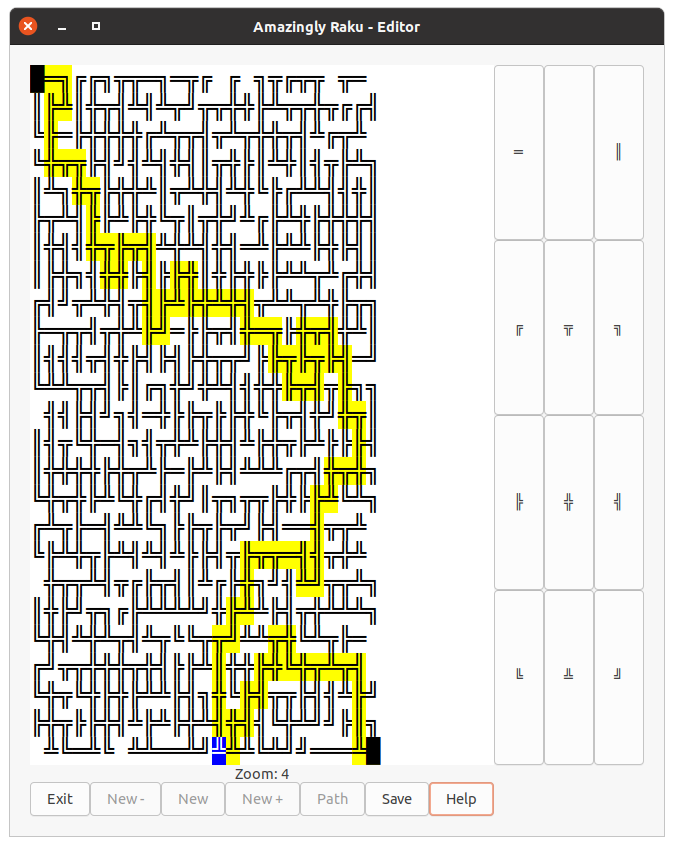
The shortest path is highlighted in yellow. Note that there may be several paths, even with the same length as this one.
Navigation (with the arrow keys) now work regardless of actual connections in the maze, so we can even go to cells that are unreachable, as shown here for an empty cell.
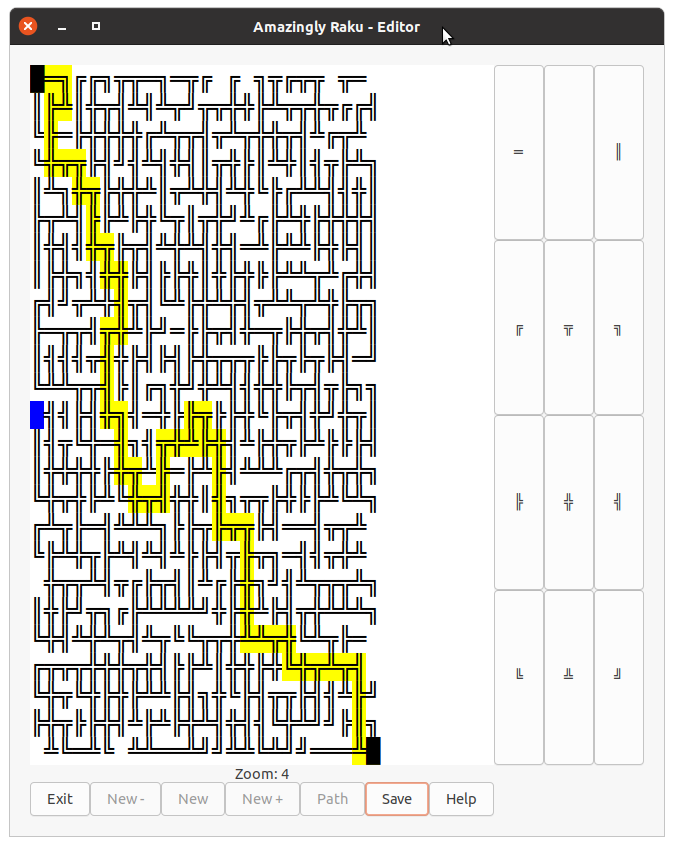
Click on one of the button to the right of the maze to change the current cell to that symbol. You can also use keybord shortcuts, on the numeric keyboard:
| / -> ═ | * -> (space) | * -> ║ |
| 7 -> ╔ | 8 -> ╦ | 9 -> ╗ |
| 4 -> ╠ | 5 -> ╬ | 6 -> ╣ |
| 1 -> ╚ | 2 -> ╩ | 3 -> ╝ |
And on the "normal" keyboard:
| 1 -> ═ | 2 -> (space) | 3 -> ║ |
| q -> ╔ | w -> ╦ | e -> ╗ |
| a -> ╠ | s -> ╬ | d -> ╣ |
| z -> ╚ | x -> ╩ | c -> ╝ |
There are also shortcuts to toggle on/off individual directions:
| u -> North | |
| h -> West | j -> East |
| n -> South | |
The keypress will remove the specified direction from the cell, if present, and add it otherwise. Note that removing a direction from a cell with only two exits will remove both, leaving an empty cell (a space). It is not possible to add one direction to an empty cell.
Toggle Off
The toggle functionality can be disabled with the «-t» command line option. In that case, the lowercase keys mentioned above (u, h, j and n) will only add the direction.
The uppercase versions (U, H, J and N) will remove the exit in the given direction. But only when the toggle functionality has been turned off.
If there are no path through the maze, the coverage (cells reachable from the entrance) is shown instead, highlighted in orange.
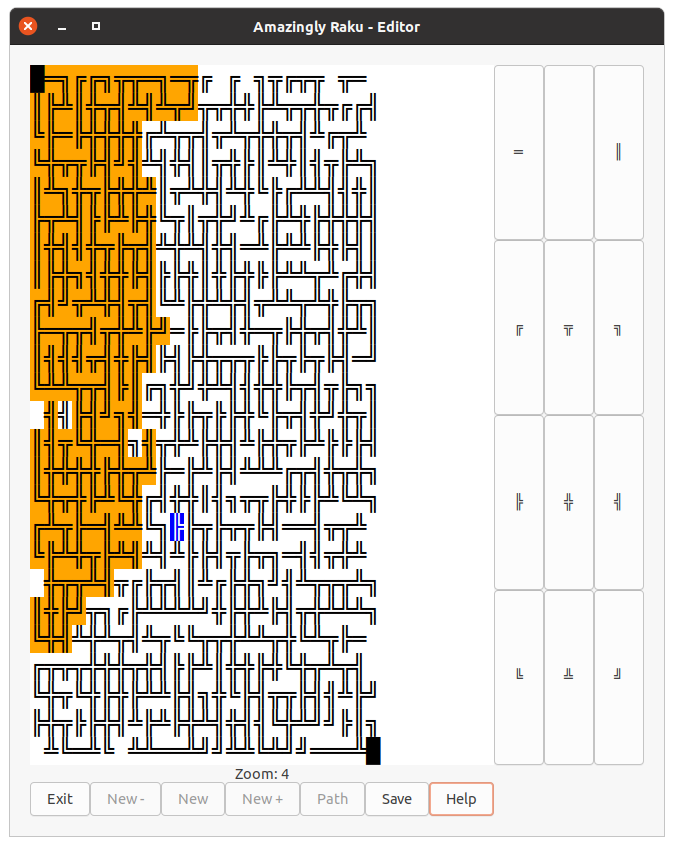
The code doing the coverage highlight looks like this:
File: amazing-gtk (partial)
  sub show-coverage(@coverage)
  {
    for ^$m.rows -> $row
    {
      for ^$m.cols -> $col
      {
        set-maze-cell('cover', $row, $col) if @coverage[$row][$col];
      }
    }
  }
Note that there may be a slight time delay before the maze is redrawn if it is large (or the pc is slow). That is caused by the way the cells are highlighted one at a time.
File: amazing-gtk (partial)
  sub set-maze-cell ($tag, $row, $col)
  {
    my $pos1 = $tb.get-iter-at-line-offset($row, $col);
    my $pos2 = $tb.get-iter-at-line-offset($row, $col +1);

    $tag eq 'path'
      ?? $tb.remove_tag_by_name('current', $pos1, $pos2)
      !! $tb.remove_tag_by_name('path', $pos1, $pos2);

    $tb.apply_tag_by_name($tag, $pos1, $pos2);
  }
Here I have expanded the coverage area somewhat:
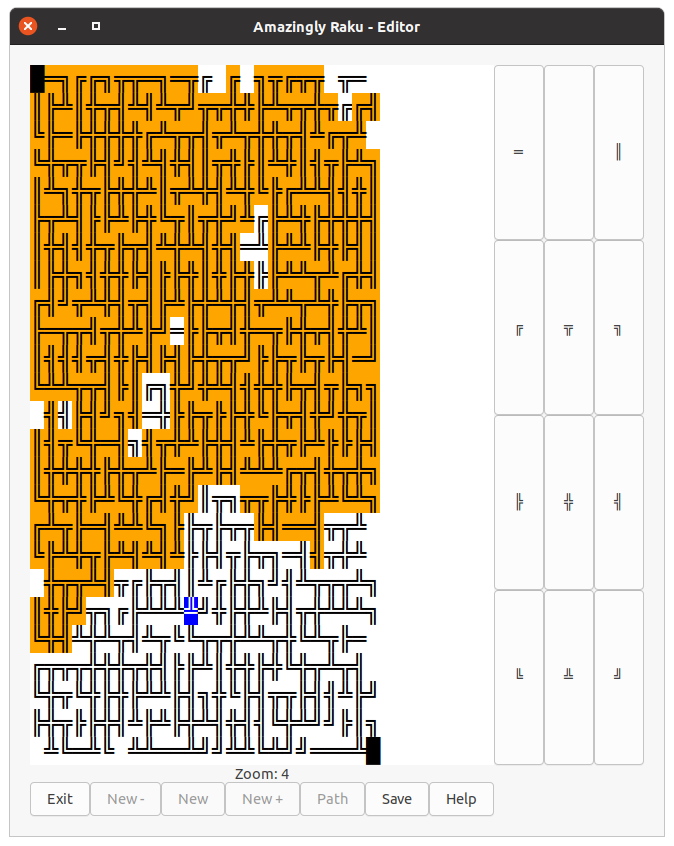
Changing one symbol may cause the maze to be traversable again:
Part 8: The Future
See the next part; Part 8: The Future where I discuss the future plans for the module and bundled programs.